

There are thousands of ridiculous gadgets on the internet today. Kitchen gadgets is probably the genre with the greatest number of unnecessary items. I worked for 5 years at a retail job that focused largely on kitchen gadgets. I’ve seen it all- strawberry hullers, banana slicers, corn cob butterers. If there is some process that takes place in the kitchen, some hopeful inventor has devised a gadget to “make your life easier.”
Because I spent 5 years exploring what we called the gadget wall, I had the chance to try many gimmicky gizmos. Some of them withstood the test, and some of them became clearly unnecessary. One gadget that I never saw in the store but ran across during one of my late night online impulse buys was called Onion Goggles.
At first, I thought it was silly. Sure, cutting onions sucks…but does it really require eye protection? But, thinking back to all the times I’ve cut onions, I reconsidered my skepticism. It seems like every time I cut onions, my eyes pour tears in defense against the onion’s stinging particles released from the cut. It’s a job I dread. I spend a lot of time cooking. I’m the main cook in our house, and I genuinely enjoy cooking, so I come across this problem frequently. Many times, my husband offers to cut the onions for our dinner because he knows how seriously I react to them. Apparently, his eyeballs are a lot tougher than mine!
So, I purchased a pair of onion goggles and waited for my first opportunity to use them. Recently, we had a meal of pulled pork sandwiches, and I wanted to make caramelized onions to go with it. Caramelizing the onions brings out their natural sweetness and goes very well with the tangy zing of the barbeque sauce on the pork. So, I busted out my newest kitchen fashion accessory and gave them a try.

I was very skeptical. Over the years, I’ve tried many of the Old Wives’ Tales based around ways to keep onions from hurting your eyes and had yet to find one that works. I’ve tried leaving the roots on while cutting the onion. I’ve tried using a very sharp knife. I’ve tried coating my knife in several different substances before cutting into the onion. I’ve tried many others. None of them worked for me, so the onion goggles were really my last effort before giving up on fighting it.
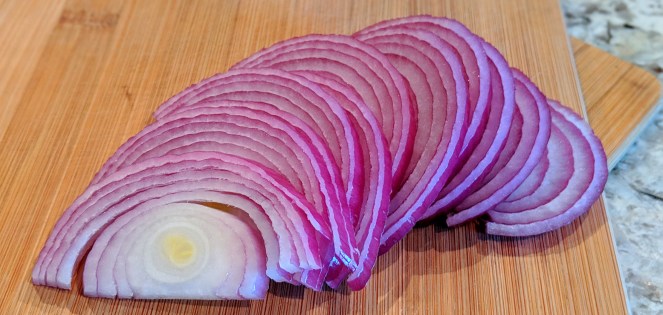
I needed to cut up the entirety of my red onion, so I was able to give my goggles a fair first try. As I began to cut the onion, I noticed that the lenses started to get what looked like tiny water droplets on them. That must be what normally gets in my eyes. Yikes! To me, that was physical proof that the goggles worked. After getting through an onion cutting experience tear-free, I’d say that these onion goggles lived up to their purpose. I’ll be keeping them handy in my kitchen from now on.
If you’re looking to get a pair for yourself, I’m not here to recommend any specific brands, but I can recommend some criteria for your search. Make sure that the goggles you purchase come with some sort of particle blocking material around the frames where they sit against your face. This is the main protection against the onion’s sting. Additionally, it is useful to purchase a pair with a strap that goes around the back of your head to hold them on rather than them just sitting on your nose like a regular pair of glasses. Even with a foam barrier between the glasses and your face, if they’re not held against your face tight enough, there will be plenty of gaps for onion particles to sneak in and make your purchase pointless. The pair I purchased were like regular glasses but came with an optional band that attaches to the frame. This band worked perfectly and was quite stylish, if you ask me! They made me feel like a kitchen superhero!

I give this product: 5 out of 5 Bear Tracks!


