It has been over a year since I first tried Lumē Deodorant, and I’ve been using it almost that entire year (minus a few weeks as an experiment). I’ve made 4 purchases from their company, usually of discounted bundles (the only thing junk email is good for is discounts), and I’ve spent $130.52 total. I have ALSO tried a couple different aluminum free deodorants in that time to see how they rank up against my Lumē. First, HERE is my most recent review of Lumē Deodorant.
Next, here are the other two aluminum free deodorants I tried against Lumē:
Dove 0% Aluminum Deodorant in Cucumber and Green Tea
Native Deodorant in Cucumber & Mint
“I think, somehow, Target fills us with hope as we walk down their clean aisles, items curated to scream “TAKE ME HOME” to every basic mom, such as myself, so that when we get up to the register and they explain calmly that they are going to remove several hundred of our hard earned dollars from our bank account that we don’t blink an eye but smile vapidly and have instant buyer’s remorse.”
You had me at Dove
Dove has been my go-to for years. But will the aluminum free version work?
Dove 0% Aluminum Deodorant smells good… until I sweat right through it with my stinky pits within 30 minutes of applying it. Come on, Dove. I’ve spent hundreds of dollars on your regular deodorants over the years, slowly poisoning myself with aluminum. The least you could do for me is give me a natural deodorant that WORKS. Well, to be honest, I didn’t expect much after using Lumē for so long. I used the Dove 0% only a few times (just to make SURE it wasn’t a fluke). It wasn’t a fluke. Unfortunately, this deodorant did not keep my stink away.
Going Native
I was really hopeful for Native deodorant. First of all, I found it at Target. And I think, somehow, Target fills us with hope as we walk down their clean aisles, items curated to scream “TAKE ME HOME” to every basic mom, such as myself, so that when we get up to the register and they explain calmly that they are going to remove several hundred of our hard earned dollars from our bank account that we don’t blink an eye but smile vapidly and have instant buyer’s remorse. So when I saw this $12 “paraben and aluminum free” deodorant on the shelf, I thought, “why the hell not?!”
This stuff smells amazing. But does it keep away the bad smells too?
The first thing I noticed about the Native Deodorant is that it smelled super yummy. It had a distinct essential oil or extract smell rather than other deodorants with laboratory created “parfum” smells like something you throw in your gym bag to keep it from smelling like the bacteria factory it most certainly is. Native’s sharp and clean scent was sure to blast my stanky pits to kingdom come with freshness. I applied it after a shower, just like I had with the Dove, to give it a fighting chance at combating my underarm bacteria.
“Do I have to chase my two gremlins? You betcha. Do I sweat because they raise my blood pressure? Oh, probably. But if these deodorants can’t DEODORIZE me in the most common activities of my life, I can’t make them a staple of my hygiene routine.”
Unfortunately, it also fell flat for me in terms of smell protection. Now, to test these, I wasn’t doing any strenuous exercise like I had done with the Lumē months ago when I was shoveling several cubic yards of river rock in 90-100 degree weather out in our yard. Both the Dove and the Native could hardly handle my day to day mom life. Do I have to chase my two gremlins? You betcha. Do I sweat because they raise my blood pressure? Oh, probably. But if these deodorants can’t DEODORIZE me in the most common activities of my life, I can’t make them a staple of my hygiene routine.
Hello, Lumē, My Old Friend…
So every time a new “deodorant” has failed me, I’ve found myself going back to Lumē. Just like running into the arms of an old friend who I know is going to wipe my sweat away and kill the smelly jerk bacteria that keep haunting my pits. Lumē has been there for me. And to top it off, I had a representative FROM Lumē contact me about my last review concerns and make suggestions on how I can test their product better. The best part is that their suggestions actually helped! In my last review, I stated that I wasn’t sure how long my body’s “detox” period was because my hormones and a few other factors were making that unclear. This meant that even though the Lumē was still working, it wasn’t lasting as long as it had previously and I was unsure of the cause.
Lumē has been working overtime for me for a year. But is it still number 1?
The Lumē representative that contacted me suggested that I try a clothes detergent that had enzyme technology to fight and kill the bacteria that can build up in clothes. Honestly, I don’t know why I hadn’t tried this sooner. I knew of these detergents but was unsure if they could really help me. So, per her suggestion, I tried Pursil Liquid Laundry Detergent in the Odor Fighter variety I found at my local grocery store. It specifically boasts “Odor Fighting Technology” and has seemed to work very well for me. It hasn’t made the problem go away 100%, but it’s drastically better than it has ever been.
Since changing to an odor fighting detergent, I feel like the Lumē has had a better chance to work to its fullest potential. The only time I’ve found the Lumē to fail at all anymore is when I work up a deep sweat in my mommy fitness class. Especially during the time of the month when my hormones are most haywire, I tend to go through days of excessive sweating that is hard to mask without showers twice a day. Sheesh. Isn’t motherhood beautiful?!
Conclusion
So, in short, here’s what I’ve learned. If a deodorant doesn’t boast an aluminum free alternative that actually KILLS the bad bacteria that makes you smell in the first place, its MUCH less likely to actually work. Now, I have heard good things from people through the mommy-sphere who have had positive experiences with many “natural” deodorants. But, for me, they don’t work if they’re not getting rid of the bacteria.
*As an Amazon Associate I earn from qualifying purchases. This means if you purchase anything through my sponsored links, I receive commission at no additional cost to you. My views and opinions are not swayed because of this; I only recommend products and services I love.)*
Board games have been a great way to practice colors, counting, and taking turns.
Whether you’re stuck inside because the weather’s too cold or too hot, or the air quality is bad (we get wildfire smoke every year where I live), or there’s an unbelievable plague waging war on the nations outside your door (see- 2020 Coronavirus), there are a million fun things you can do to entertain your kid(s) and keep yourself sane. I have written down 101 of my favorite time killers that are super simple and fun. I have broken them down into three categories: activities that require some form of technology, activities that only require yourself (and simple household items like pencil, paper, string, etc.), and activities that require something that you MIGHT not have in your home. Activities from the last group use things that are fairly common but may not be readily available to your family. I will do my best to provide suggestions on where to acquire these items.
Activities with technology
I know not everyone likes activities that involve screen time, but let’s be realistic, there are so many fun things you can do with technology! My family is fairly technologically savvy but we do everything together. Even when it comes to TV and movie time, we watch together. Most of these (18) activities can be done using a smartphone, tablet, or computer and shouldn’t require any apps or downloads that cost money. I want to keep this list of activities affordable to all or most families!
My little cook! Always wants to help.
Who doesn’t love a dance party? Pump up your favorite tunes and dance like no one (who cares) is watching!
Make your own cooking/baking video. You don’t have to post it on the internet, but it is fun to pretend you have your own cooking show.
Play video games. I know this sounds pretty open ended, but that’s the point! Video games look different to different families. Play WITH your kids. Learn some new skills or beat each other’s high scores.
Baking- try a new cookie recipe. Cookies are usually pretty simple, and there’s a world of possibilities out there. Make a new combination with some items you already have in your pantry! Explore my Pinterest cookie board for ideas!
Cooking- try a new recipe from a different country. Branch out and try something exotic that is new to your family. Kids LOVE helping with cooking! Here is a link to the “toddler learning tower” we use at home to help elevate our kids to counter-height safely. (This is an affiliate link which means if you purchase anything through this link, I receive commission at no additional cost to you. My views and opinions are not swayed because of this; I only recommend products and services I love.)
Create a stop-motion video using toys and a smartphone camera. Use toys that you can pose and move, then take a picture after every move. Then splice them all together in a simple video editing app. This kind of activity is great for older kids!
Learn and practice new hairstyles on YouTube. YouTube is full of great video tutorials of hair styling from simple to complex and crazy! No matter your level of experience, there is something for you to try and learn. Kids can try too!
Find a new craft on Pinterest to try. This is probably one of my favorite things to use Pinterest for. I’ve saved thousands of craft ideas at this point. Check out what I’ve got on my kids crafts board. It’s filled with activities, crafts, and learning projects.
Kids Yoga. This is a good activity if the kids are getting restless and need something to focus their minds and calm their little bodies. I’ve heard great things about Cosmic Kids yoga on YouTube. Looks like they also have an app! This is a great way to transition into quiet time, nap time, or even first thing in the morning.
Music guessing game. Play a second or two of songs your kids know and see if they can guess them. They may surprise you with their crazy good memory!
Tell stories or read books around a “campfire”. You can create a campfire atmosphere by using an ambient light app, or a flashlight, or a nightlight. In my son’s room we have an Echo Glow, a smart light that pairs with Amazon Alexa and can change it’s color with your voice command! It even has a “campfire” setting that glows like a moving fire! (This is an affiliate link which means if you purchase anything through this link, I receive commission at no additional cost to you. My views and opinions are not swayed because of this; I only recommend products and services I love.)
Movie roulette. Have everyone choose a different movie or you choose several. Place them behind your back and pick one blindly or from a bag. This can also be done using streaming services by choosing a movie genre, closing your eyes and using the controller to hold the scroll button in one direction and let go at a random point. The movie or show it lands on is what you watch!
Make-up tutorial. Watch and try or create your own make-up tutorial using play make-up, make-up you’re okay with letting kids use, or buying dollar store make-up. Making your own kid-based make-up tutorial could be really fun!
Tour the world with Google Earth. Exactly what it sounds like! Let your imagination soar by visiting all the places on Earth that you dream of visiting. Here is a link to Google Earth, have fun exploring!
Guess the attraction with Google Maps Street View. This activity is great for older kids, especially those who’ve had some geography lessons. Check out this one to get you started.
Learn some simple magic tricks. Learn them yourself to perform for your kids or have them learn along with you to amaze their friends. Just crack open YouTube and search for “magic tricks for kids” to get you started.
Learn a few words in a new language. YouTube and Google are both helpful for this. There are tons of great language tutorials on YouTube, while Google offers a translator that will help you pronounce any word. Just pick a language!
Learn a few sign language signs. There are a lot of helpful books at your local library (especially for baby sign language) and Google is, once again, a great resource here. Google search “sign language” plus the word you are hoping to learn, and you will have many resources pop up instantly.
Activities That Could Require More
It’s difficult to write completely generalized lists because everyone has different circumstances and resources available to them. This next list is made up of 40 simple and cheap activities that shouldn’t require anything too crazy. I will try to provide ideas on where to get the things you need in order to do them.
Our rice bin is always a hit. Great for pouring, mixing, scooping!
Dry food play. In our house we use dry rice that we’ve dyed fun colors and then placed in a sealable container. You can also use beans, lentils, or any other food or material that works. You can use it with toy cars, cups and bottles, shovels and trowels, and anything else you can think of. Here is a link to a tutorial of mine where I show you how to make the colored rice and give you ideas on how to use it to teach your child to hypothesize. It’s never too early or late to learn!
Ripped paper pictures. This is something I’ve loved since I was a kid. And it doesn’t require scissors! I go to the dollar store and get cheap packs of construction paper to keep on hand for projects like this. All you do is rip shapes out of different colored paper to create a larger picture. This is great practice for young kid’s motor skills. We’ve used this project to make decorations for several holidays or just for fun.
Spa day. You don’t have to spend a ton of money to have a fun spa day with the kids. You can use sample sized things you’ve collected, take a fun bath, wrap yourselves up in clean towels and bathrobes, paint nails, try out hair styles and accessories, face masks, mini massages, or anything else you can think of to make everyone feel special and clean! I like to sneak in the nail trimming sessions to our spa days, haha!
Cardboard box race cars. If you’re anything like our family, you’ll have a surplus of delivery boxes sitting around, waiting to go out with the recycling. If you have any large enough to fit a sitting kid, make them into race cars! Decorate them with paper and markers, glue and glitter. Paper plates make great “wheels” on the sides. Then you can slip a towel under the box to pull them around…if you’re looking for a workout, of course.
Boardgames. It’s always a good idea to keep a decent collection of boardgames on hand to fight family boredom. Collect a wide variety or age ranges and number of players when stores like Target and Fred Meyer have big sales on boardgames. You can also take pictures of the boardgames you’re interested in and search for them on Amazon to see if you can find a better price. (I do this with most things, haha!).
Masking tape floor maze. When you have kids, there are a million and one uses for masking tape (or colored painter’s tape). If you have a large floor space available, use the tape (which won’t leave a residue) to create as simple or intricate a maze as your imagination can create. Then let kids walk it or drive their toys through it.
Masking tape hopscotch. Using masking tape, create as short or as long a hopscotch course as your kids can handle. The tape is so flexible you can even use it to create numbers or letter inside the squares. Here is a great option for colored masking tape from Amazon. (This is an affiliate link which means if you purchase anything through this link I receive commission at no additional cost to you. My views and opinions are not swayed because of this; I only recommend products and services I love.)
Masking tape roads for cars. Using masking tape, you can create nearly endless roads for your kids to explore with their toy cars. Remember that kids’ imaginations allow for a break in the laws of nature. Don’t be afraid to make those roads go up over furniture and over big jumps.
Build a bird feeder or bird house out of recycled materials. Check your recycling bin for things like milk cartons, jugs, straws, and cereal boxes. Thoroughly clean out your chosen materials and use a little glue and/or tape and a lot of imagination to create a refuge for your avian friends. Bird seed may be the only material you wouldn’t likely have on hand.
Use toilet paper tubes to make pretend binoculars. Of course, they won’t magnify anything, but imaginations can make up for that! Tape or glue a couple toilet paper tubes together and use your new binoculars to search for local wildlife. Explore further by opening a window (weather permitting) and match sounds with the observed creatures.
Brick building competition. This is a fun one to do with Legos, Duplos, Megablocks, or anything you prefer. Create an idea to work off of (create a car, spaceship, house, etc.) and let each person build their own. Then award each of them with a different compliment award at the end!
Build a cardboard box castle. Put those Amazon boxes to good use! Doesn’t have to be pretty, just fun!
Doll fashion show. Dress up your dollies and walk them down the catwalk with your most inventive fashions. For extra points, use more creative materials in your fashion design like pipe cleaners and googly eyes.
Glow stick bath play. Head down to the closest dollar store and stock up on $1 packs of glow sticks. Fill up the bath tub, get some glow sticks glowing and throw them in the water. Make sure to turn the lights out! Just keep things safe by sitting near by. This activity entertains my preschooler until the water turns cold.
Masking tape cardboard game board. Grab your masking tape and make a grid based on whichever game you choose. You can make the tape grid directly on the floor or grab a large, flat piece of cardboard to put the tape on. Then, search your toy bins for different pieces to play tic tac toe, checkers, 4 in a row, or battleship if you want to get really fancy!
Card games. Everyone has their favorites. Many are easy to teach and understand for young kids (Go Fish, Old Maid, War, etc.) If you’re drawing blanks, do an internet search. You’ll find so many!
Plant seeds in egg cartons. Fill up the holes in an egg carton with some dirt and throw in some seeds! Don’t have packets of seeds? Check your fridge! If you’ve got fruit or vegetables with seeds, it’s worth a try. Just set your carton in the window for sun and water it when the dirt gets dry. Your kids can learn about beginning a garden.
Grow beans in the window. All it takes is a dry bean, a wet paper towel, a zip lock baggie, and a piece of tape! Lay the bean on the wet paper towel and put both in the baggie and zip them up. Tape them to a window to get sun and wait a bit. It’s a great way to see how a seed grows from the very start.
Build the most epic Hot Wheels track ever built. Yes, this takes a pretty decent collection of Hot Wheels tracks, but don’t forget to let the creativity flow. Start upstairs and run downstairs. Make a chair obstacle course. Use walls to get extra speed. The possibilities are exciting!
How high can you stack? We love this game in our house. Legos, Duplos, Megablocks, even things like Cheerios are stackable! Choose materials and have a stacking competition. Simple fun!
Musical parade. Grab all the musical instruments in the house or find things that can work like instruments and hand them out. Every participant should take a music maker and walk in line to create a cacophony of fun.
Potato stamping. This craft requires a few things- potatoes, washable paint, paper, and a knife. Cut potatoes in half and CAREFULLY carve different shapes into the cut side. The potatoes can then be used as big stamps.
Vinegar and baking soda volcanoes. This project can be as elaborate as you want. The simplest version is to find a bottle with a narrow mouth and put several spoonfuls of baking soda inside. With the container over a tray, in a sink, or in a bowl to facilitate easy clean up, slowly pour vinegar into the bottle and watch the chemical reaction. Volcano!
Clay/Play-Doh stop motion animation. Create your own characters and scenery and change it one photo at a time. Then use a simple editing app to string them all together into a fun video. It’s a lot of work but worth it in the end.
Cat’s Cradle and other variations. A classic game that just takes a long piece of string (yarn or something a bit thick works best), two sets of hands, and a little bit of research if you don’t know how to do it.
Coloring books. This is another thing that is great to get at the dollar store. I like to stock up on some generic ones plus some favorite cartoon characters. The dollar store also has Crayola crayon packs for those with kids who like to break them (like mine).
Sticker art. Another great dollar store find is cheap stickers. Stock up! We use stickers to create works of “art” to tell a story on a single page.
Puzzles. Here is something else I found but didn’t expect to get so much use out of from the dollar store. Cheap puzzles! Dollar store puzzles aren’t the most durable, but it’s a lot less annoying when you lose a piece and the whole puzzle becomes “incomplete”. If we lose too many pieces, it doesn’t hurt us to just recycle it.
Fastest puzzle competition. When you can find simple puzzles for less than 100 pieces, you can pick up several and see who can put theirs together the fastest, upside down, blindfolded, etc.
Book Jenga. After a fruitful library trip, we like to stack all of our books on top of each other into a giant tower. After that, take turns trying to pull one book from the pile without toppling the entire stack! In our game, it’s okay to touch the stack to remove your book; you just can’t lift the others from on top of it.
Color mixing with food coloring and water. Using clear glasses of water, add food coloring droplets in each glass to create a rainbow. Then experiment with mixing colors to create new colors!
Container drums. Anything can be a drum if you try, haha! We like to use large oatmeal containers and anything else from the recycling bin that makes a good sound. Tape or glue them together if you’d like to create a whole drum kit.
Toy ice rescue. This one takes some planning to freeze some waterproof toys into large bowls of water in your freezer. Then give kids (safe) tools to use to excavate their frozen friends. Be aware that this one is messy because of the melting water. Have towels on hand and place the large ice pieces into something that can catch the melting ice.
Cereal box inventions. Save multiple empty cereal boxes from the recycling and have an invention contest using other materials from the recycling or craft supplies on hand. See what you can make out of a cereal box!
Pickup sticks with plastic flatware. Accumulating a lot of plastic spoons, sporks, or knives? Throw them in a pile and try to remove one (not from the top) without disturbing the others.
Build a pirate ship. This one can be a great mashup of pillow forts and cardboard box castles. Find and old sheet for sails and remember, every good pirate needs a parrot on their shoulder!
Temporary tattoos with washable markers. I get that not every house allows drawing on oneself, but wouldn’t it be fun to try it just once? Pick a design and then do art on each other. Make sure to take pictures because washable markers don’t last long.
Play UNO with added rules. Have an UNO deck? Every time someone puts down a Draw 4 for someone else, the person who put it down has to do a different dance move. This is just an example of weird new rules you can add to the game to change it up a bit.
Magazine “vision” boards. If you don’t have any magazines at home, a thrift store book section might have just what you need. You can find stacks of cheap, colorful magazines way past their release date. Then use scissors and glue to add pictures, colors, textures, and words to a large piece of paper to create a goal/vision board. These can feature a specific goal you want to work toward, or something special in your life you’re looking forward to.
“Operation” toy removal. This is a fun game for all ages. It works best to run string or yarn randomly, back and forth through the holes of a plastic hamper. Then place different size and shape toys at the bottom of the hamper. Using hands or tools like chopsticks (for the highly skilled), carefully reach through the yarn WITHOUT TOUCHING IT and remove the toys safely. More string lines makes it more challenging.
Activities That Don’t Require Much
These activities are the easiest to do because they don’t require anything but yourself (and maybe a pencil and paper)! Several of them are things you’ve probably already heard of, but if you haven’t, give it a Google. They’re all pretty simple.
My preschooler loves to set up a “store” where we can come spend our pretend money.
Hide and Seek
Leap frog
Slow motion tag. It’s like regular tag but you have to move in “slow motion”. This is the best indoor alternative I’ve found to prevent injuries.
Mad Libs. Don’t have a book? Write you own “story” and then ask your kids to fill it in. Keep it simple for the littlest ones and stick to adding in nouns.
Short story writing. This is extra fun when you let each kid write a different line or a different character.
Create a superhero costume. These turn out funnier and more creative when you use only clothes and items you already own.
Build pillow forts
Read books in different voices. This is a good opportunity to re-read some of your favorite books, but in a completely different voice. Now read it again in another voice!
Spring cleaning (any time of year). You might be surprised at how much kids can like cleaning. They enjoy having a “job” and doing things they see adults doing. Why not get some things cleaned WHILE playing? Make a game out of it.
Donate some toys. Spring cleaning doesn’t just have to be about dusting and wiping. It can also be a good opportunity to lighten the load and organize the toy box. This is a great opportunity to teach your children about being grateful for what you have and generous to others.
Fashion show. Using clothes you already have, come up with some of the wackiest combinations you can imagine and then strut your stuff on the runway (a hallway works great for this!). Don’t forget hair accessories!
Create a “store”. Kids love acting out things they see modeled in every day life. Even if you don’t have any fancy store front, collect toys or items you would like to “sell” and then act out the buying and selling part of everyday life. In our house, we like to use old, empty gift cards as credit cards. Go for the full effect and get some bags to pack the new purchases in. Old receipts are a fun way to add authenticity too.
Sock scooting. This works best on hardwood floors but can also work on any smooth surface. Put socks on feet AND hands (that’s my son’s favorite) and scoot around on all fours. We pretend we’re doggies, or cars, or skiing, or pretty much anything.
Sightseeing around the house. This is another activity where toilet paper tube binoculars come in handy. But really, you don’t need them when you have two hands that can act as pretend binoculars. Walking in a line with the tour guide leading the way, give a tour of sights and scenes around your house in the silliest voice possible. I guarantee you’ll see things in a new light.
20 guesses game. Can you guess what I’m thinking of in only 20 guesses? Yes or no questions only!
Charades with toys. Try playing the classical charades game but using only toys you already have instead of your body.
Practice/learn counting money. This can be done using real money, play money, or even cut out paper money.
In house camping. Find a part of your house that you don’t normally sleep in and bring blankets and pillows. Build a “campfire” and lay around together telling stories or reading pretend constellations on the ceiling. Did I hear a bear?!
Draw something using only one continuous line. Don’t lift the pencil! Can you tell what it is?
“Warmer/colder” game. This has been something I’ve loved since I was a kid. Hide something and help someone find it by only using the descriptions “warmer” for when they’re getting close to it and “colder” when they’re getting farther away.
“Copy this rhythm” game. Clap out or stomp out a made up rhythm and challenge someone to repeat it.
“Copy this dance” game. Same as above but with dance moves.
Hand tracing art. Trace your hand and turn it into something other than a turkey. Use both hands!
Clapping games. Standing face to face, try to keep a rhythm of clapping your own hands and then clapping your partner’s. There are so many variations to these games that you can find many on the internet or make up your own.
Strength training using only a wall. This is a great way to add fitness into the fun. Some good options are: handstands, pushups, wall sits, etc.
Hide and seek BINGO. On a piece of paper, make a bingo board and fill each square with a drawing or description of things hidden around the house. The kids then have to find those objects and whoever can fill up a whole row or column wins!
Animal charades. It’s like regular charades but only about animals. Play by acting out different animals. This is a great one for the young kids who have learned multiple animals.
Hot potatowith a stuffed animal.
Gross soup. This is something I loved doing as a kid. Take a pot or bowl and put some water in it. Then, using (old or expired) spices, let them measure out or dump those spices into the water and stir it up. They can pretend to cook something without wasting the good stuff.
Guess the animal. Similar to animal charades but only using animal noises as the clues.
Race to get dressed. Pick out one article (or multiple for extra fun) of each type of clothing (socks, shoes, pants, shirt, sweatshirt, scarf, hat, sweater, jacket, etc.) for kids to race against each other to put on. This is a good game for older kids who have plenty of experience getting dressed.
Red light, green light
Simon says
Find the number. Search your home for things in only certain quantities. Give a number to search for and the first person to find something in that number or displaying that number is the winner.
Guess the item only by feel. You can use a box, a bag, or a blindfold to blindly try to guess a mystery object only with your sense of touch.
Shadow puppets. In a darkened room, cast a light on the wall or ceiling and use hands or objects to tell a story using shadows.
Puppet show
Theater production of favorite movies. Using homemade costumes, improvised scenery, and untrained acting, recreate your family’s favorite movies. And if they’re musicals, sing them!
NEW rock, paper, scissors. Add one or two NEW items to the old rock, paper, scissors game with rules on what beats what, then play!
Paint/draw what you see. Using whatever drawing/crafting materials you have on hand, choose a scene or create one with toys and objects and try your best to recreate that scene on paper.
Kid interviews. Think of basic questions you can “interview” your kid with (like, what’s your favorite color? Who is your favorite character? What do you like best about school?) and write down their answers no matter what. Then, have them ask you the same questions and write down your answers.
I spy. With OR without binoculars.
Toy fishing. Create your own fishing rod with a string and “hook” on the end. The hook can be something with a magnet, something sticky, or something actually hook shaped. Then place several toys on the floor behind a tall chair or couch and try to pick up the toys from the floor. Make sure to choose toys that CAN be picked up by your hook apparatus.
Plan a dream vacation. This is the totally free version of getting to do something you’ve always wanted to do. Plan out every part of your dream vacation and then verbally discuss how that would look. Where you would go, what you would eat, what things you want to see. Who knows, maybe all that daydreaming could motivate you to make it happen!
Conclusion
Grandma always makes the coolest blanket/pillow forts!
This list can be used for so many things. Please share it with school teachers you know, moms struggling with ideas during spring, winter, or summer breaks, or Grandparents looking for fun things to do while watching their grandkids. To give you one last use for this list, I’ve included a printable version of this list (below) that you can cut into pieces and put into a container to draw each idea out blindly. It makes for a fun family play night or for when you have cousins visiting and the kids are bored.
Printable
Here is the printable I promised below. I even included some blank spaces for you to add your own ideas! And once you’ve cut them out, feel free to throw out the ones you don’t like or that don’t work for your family.
*As an Amazon Associate I earn from qualifying purchases. This means if you purchase anything through my sponsored links, I receive commission at no additional cost to you. My views and opinions are not swayed because of this; I only recommend products and services I love.)*
This recipe has been passed down through our family for several generations. It reminds me of the holidays because every day or two after Thanksgiving, my grandfather would make up a huge batch of this with the leftover turkey. I loved it as a kid and would happily devour this morning, noon, and night until the leftovers were gone. I hope you enjoy it too! Be sure to check out my note section below the recipe for additional ideas on how to prepare this recipe. Ingredients and instructions with alternative methods are marked with (*) with the corresponding (*) found in the notes section.
Prep time: 10-15 minutes
Cook time: 30 minutes – 4/8 hours depending on your cooking method
Makes about 6-8 cups
Ingredients
Ingredients used to make the sauce.
4+ cups of chopped turkey (rotisserie chicken works well as a replacement*)
2 Tbsp cornstarch dissolved in 2 Tbsp cold water
¾ cup brown sugar
¼ cup soy sauce
¼ cup ketchup
½ cup apple cider vinegar
1 cup chicken broth
Instructions
In a medium sized (3 quart) cooking pot**, begin heating chicken broth on medium high heat and add in vinegar, soy sauce, brown sugar and ketchup. Stir to dissolve and mix ingredients.
As ingredients start to bubble and steam, add in cornstarch mix*** and stir briskly with a whisk. Continue to stir until ingredients begin to thicken.
Reduce heat to low and allow ingredients to simmer together for about 10 minutes. Make sure to check and stir sauce every few minutes to prevent burning or congealing on the bottom of the pan.
Once sauce is thickened, add in chopped meat and stir to evenly mix ingredients together. Let this mix simmer on low heat for about 15-20 minutes to allow the meat to absorb some of the sauce flavors.
Serve over leftover mashed potatoes, on top of leftover rolls, on buns with coleslaw, or by itself!****
Notes
*As I mentioned, rotisserie chicken can be used as a substitution for turkey. You could also make this recipe in a crock pot and start with raw chicken breasts along with the sauce ingredients. If you choose to do this method, I suggest you cook it on low for 8 hours to allow the chicken breasts to fully cook. After they cook you could shred the chicken right in the sauce and then mix the ingredients together.
I used pre-cooked rotisserie chicken for a quick and easy meal!
**You can also make this recipe in a crockpot. Using this method allows for better flavor absorption by the meat but you want to make sure to cook it on low to keep the meat from over cooking if you are using pre-cooked leftovers. If you choose the crock pot method, just place all your sauce ingredients in and mix well before adding the meat (raw or cooked).
***The cornstarch mix will only slightly thicken up the sauce and it may appear more runny than you expect. You’re welcome to play around with the cornstarch mix ratio but this recipe allows for the sauce to be thin but not watery.
****There are so many ways to enjoy this recipe. Aside from using it for leftovers, it’s great on top of rice or veggies too. The sauce is very versatile so I’d love to hear how you’ve used it. Leave a comment here on the recipe page and let me know what you did with it. Thanks!
Coleslaw is a great addition to this meal. The textures and flavors compliment each other!
Full disclosure: I DO NOT make any money or get any promotional kickbacks from Trusst Brand for my review. I am reviewing this product only as a consumer/customer.
I wore traditional underwire bras for almost 20 years of my life. Being larger chested made the underwire a necessity. It wasn’t until I got pregnant with my first baby that I considered a change. I wanted to do what was best for my baby and my body, so at that time I invested in some bras without underwire. Underwire-less bras took some getting used to because I instantly felt exposed and unsupported. Once my mind caught up to what my body had already realized, I found that I was actually way more comfortable. I nearly turned into a bra-burning mad woman when I noticed that I had developed bruising and muscle indentations under my breasts from the years of underwire digging in to support my ample chest. No wonder we women love taking our bras off at the end of the day!
After realizing my freedom, I ended up wearing wireless bras for about three years during my pregnancies and the postpartum breastfeeding journeys afterwards. I kept promising myself that when I finally finished breastfeeding, I’d buy some new, cute bras seeing as how I had just spent the last three years in the rotation of the same 4, milk-stained, incredibly unflattering stretchy bras. I started to venture back out into the retail fashion world that I had been absent from for an embarrassingly long time to find that I didn’t know where to start. Luckily, we live in a day and age where computers automatically read our minds and somehow know exactly how to advertise what we want. I began seeing more and more ads for bras and intimates. I checked some of them out but wasn’t willing to take the plunge on investing in bras that I couldn’t try on from companies that charged restocking fees.
The Trusst Brand’s Marjory The T-Shirt Bra is a huge upgrade from my worn-out stretchy-bras. The material is buttery soft and the lines you see on the cups do not show through most shirts.
Body After Babies
An unfortunate reality of carrying two babies and breastfeeding them for a combined 16 months was that I ended with completely different breasts than I started with. To make matters more complicated, we moved to a different city a year ago, and the availability and selection for what I lovingly refer to as “big girl bras” is next to nothing. I tried Target, but they didn’t keep my size in store, and what I bought online from them was not what I would consider an everyday bra due to its regular style underwire. Ouch! All other retail stores in our area were the same story. I even tried on what some would consider the “granny panties” of bras that offered full support and very little breathing room. Seriously! I felt like I was being suffocated. Plus, it wasn’t really the look I was going for; torpedo boobs and visible bra sticking out from under all my tank tops was not what I had in mind. I looked into bras from Cacique, intimates made by the Lane Bryant brand. I like the quality and selection of Lane Bryant clothes, so I figured I’d be safe. But what I couldn’t get past was their restocking fee. Since I wasn’t able to physically visit one of their stores to try on bras, and I knew that I’d inevitably need to return one or more trying to find the perfect fit for me, restocking fees were a deal breaker. Several more online retailers, including Adore Me, ThirdLove, and a couple others left me pretty discouraged for similar reasons.
I began planning a six hour round trip drive just to be able to visit a store where I MIGHT be able to find and try on bras that fit me. Thankfully, internet marketing had my back. I saw one more bra ad that sparked my interest. Trusst Brand bras first caught my interest because of their name. I thought using the word truss in their name was clever because, as Wikipedia states, “A truss is an assembly of beams or other elements that creates a rigid structure.” I thought, “well, at least I can expect these bras to have good support!” What I didn’t expect to find was a brand that not only had invented their own technology to help large chested women, but they also guaranteed their work AND did their best to make it affordable. Of course, most “big girl bras” are a financial investment, so price tags didn’t shock me much, but I still wanted to get the most out of my budget.
A unique feature of the Trusst Brand’s Naomi: Convertible Bra is the extended side panels that help smooth your figure by tucking in that troublesome armpit fat that loves to sneak out the sides. I love this feature!
Try Before You Buy
I found that not only was Trusst Brand willing to give me 40% off my first bra (by signing up with my email) but they also have a program to try before you buy. Trusst Brand’s try before you buy program sounded too good to be true, so I made sure to read ALL of the fine print before signing up. I found that their program was actually very simple, and there was little to no fine print. You take their online “quiz” to find out your size (which is important because Trusst doesn’t follow the same sizing as most bra manufacturers). This might sound like an annoying inconvenience but I’ll share what I learned from trying the Trusst sizing in the next section.
Trusst Brand’s “Try Before You Buy” system allows you to choose three bras to try on (any sizes or styles) at no initial cost and only pay for what you keep in the end. This means that you can have three bras sent to your house at no initial cost to try on in the comfort of your own home. If you choose to keep any of them you pay for what you keep, but not right away. If you decide to send any bras back and exchange them for different styles or sizes, they will not charge you until you have everything in-hand that you intend to keep. At the time that I made my purchase, I exceeded the minimum requirement for free shipping so even though I exchanged one bra for a different size and sent one back entirely, I didn’t pay any shipping. And no restocking fees! It was great.
Trusst Brand’s Sizing
It was hard for me to trust the fact that Trusst Brand had done their homework in creating a solid sizing chart that translated from traditional sizes to their own. So when I made my initial “Try Before You Buy” purchase, I chose one bra in the size they recommended and two in a size up from that because I was afraid that their sizing was too small. It turned out that I was way off. The size that they had measured me for was nearly perfect. The larger sizes I chose were much too big. Traditionally, I’m a DD but the Trusst Brand sizing chart measured me for (what they call) a D. See why it made me nervous to order their suggested size? Thanks to their super easy returns system, I was able to send back and exchange for the exact bras I wanted.
Special features that make these bras even more worth the cost: strong construction, generous hook closures, rose gold hardware, and a cross-back hook option.
The last thing I’d like to note about the size the Trusst Brand measured me for is that I still feel like it might be slightly too big for me but that might be because around the time that I was measuring myself and ordering the bras, my body was still adjusting to being done breastfeeding. I may have lost an inch or so of fat where the bra band sits, which means that even though I keep my bra on the tightest setting, the band is still a little loose on me. But it may be possible that they measure a little generously in the band size. I’ll have to do a follow-up on that if I buy another bra from them in the future.
Trusst Bra Quality
Over the years, I’ve had the opportunity to try many different bras from different sources and quality levels. When I was young and on a tighter budget, I got my bras from department stores. Department stores carry a pretty wide variety of bra qualities, but current prices seem to reflect an inflation of cost without much progress for quality. The materials and makeup of the department store bras may have improved slightly over the years but the prices seem to have gone up more than they’re worth, in my opinion. That doesn’t mean it’s impossible to find something good there, but it means you may have to work harder to find it.
Eventually, I “graduated” to what I thought at the time was higher quality bras from Victoria’s Secret. They’re definitely slightly better than what you can buy from a department store, but you pay a bit more for the name brand. It was always hard for me to find a style in VS that not only fit me but was practical AND flattering. Being larger chested narrowed down my choices to begin with, but finding a style I liked that worked under regular clothing and didn’t cause me to spill out in all the wrong places was difficult. I spent years wearing VS bras but was completely underwhelmed by the cost to comfort ratio. Why did I have to pay so much money for something that wasn’t completely comfortable for my body?
The interior lining material of both types of bra I tried from Trusst Brand was so soft and comfortable against my skin with the bonus of being moisture-wicking. Plus, the sewn parts seem very durable and do not irritate my skin. Most of the time I can easily forget I’m wearing anything!
Finally, after dealing with the changes my body has gone through after having kids and realizing that I’m willing to pay a little more for comfort over cuteness I found Trusst Brand bras. My first impression when I took the bras out of their packaging is that the material they use to make them is buttery soft. The material works really well under regular t-shirts and thin tank tops. Plus, it’s very soft on the skin. The cups are nicely shaped and give me way more lift than I’m used to! I was a little worried when I first put the bra on that I’d look like my boobs were going to knock satellites out of the sky, but once I put a shirt on over the bra my chest didn’t look odd at all. I guess I’m just so used to my new old boobs that I didn’t know what to expect from my new new boobs, haha!
Technology > Underwire
An image from the Trusst Brand website showing their patented support structure.
When I first started looking for new bras, I figured I’d have to make some sort of sacrifice and that I’d have to live with some level of discomfort. When I first found Trusst Brand, I chose them based on the fact that they had a wide range of sizes, plus they had a great exchange and return policy. What I didn’t count on was finding all of those things from a company that had ALSO developed a brand new technology to help large-chested ladies find a more comfortable alternative to underwire without compromising support. Sounds too good to be true, right? Well, they did it. Here is a little bit more on the technology you find in every Trusst Brand bra.
The image to the right shows an illustration of the Trusst Brand’s patented support structure. It’s made of a hard plastic, which allows for it to be easily moldable while still being light so as not to add weight to an already heavy load. The plastic piece has some shapes that pop out three-dimensionally above the main curve, which gives the whole shape its strength. The nice thing is that those popped-out shapes are hollow. This means they use less plastic to make them, making them lighter and cheaper to make (less cost to pass on to the customer), while still providing a strong shape.
When I first started reading about this new technology, I was skeptical about its comfort. I thought for sure that the bottom of the bra cups would still push against my ribcage to provide support and leave my skin bruised and dented. That is always the struggle I came across with traditional underwire. Once I got the bras and tried them on, I found that this was not the case for Trusst Brand bras at all. Not only is the inside material soft and comfortable on skin, but the shape of the bottom of the cup (where the plastic support sits) does NOT push into the ribcage but sits perfectly spaced from the body while keeping a good form and not losing support or causing breast tissue to slip out the bottom. Trusst Brand has done an amazing job at padding the bra just right to prevent you from feeling the support structure while not over-padding the bra and making it feel bulky or fake. I can wear these bras all day without discomfort. I’ve only had them for a couple months, so I will do a follow-up review once I’ve put more miles on them and can truly attest to their lifespan through normal wear and tear.
In Conclusion
Trusst Brand seems to offer everything I’ve been looking for in a bra company. They have a great product, created with groundbreaking technology, backed by great policies, and the convenience of online purchasing. The only thing I hope they are able to change in the future is to expand their color and pattern availability. With proper care, I’m imagining getting a lot more life out of these bras than any I’ve purchased before. They’re built for comfort AND built to last. So far so good. I look forward to creating a positive follow-up review in the future. But for now, I give this product a 5 out of 5 bear tracks rating.
I give this product 5 out of 5 bear tracks. That’s my first product with that high of a rating!
I use this recipe in place of traditional taco meat. It’s perfect for tacos, nachos, chip dip, burritos, or taco salads! I like it because it has a ton of flavor without having to rely on a lot of salt or spices. I keep the ingredients on hand in the pantry (aside from the meat) so that I can easily make it any time. Also, it can be made in less than 30 minutes! Bonus!
Prep time: no prep time unless you count opening packages.
Cook time: approx. 10-15 minutes.
Makes about 1-2lbs of meat mix.
Ingredients
1 lb ground beef (I use the leanest I can afford)
1 lb ground turkey meat (I use this to add volume without adding more beef, but you can use whichever meat choices work for you)
about 16oz your favorite salsa (I use chunky Pace because I like the texture it adds)
1 can black beans (about 16oz)
2 Tbsp taco seasoning
Instructions
Put all meat into a large cooking pan. Brown and mash the meat into crumbles on medium heat until only a slight amount of pink remains in the meat.
Add the can of black beans. Simmer for a minute or two.
Add taco seasoning and mix into meat using the juices created by the cooking meat to help mix it in.
Once taco seasoning is mixed into the meat, add the salsa. Mix all ingredients well until they are evenly mixed.
Set heat to low and simmer for about 5 minutes. This allows the beans to soften and the flavors to mingle.
Serve hot and enjoy!
Steps 1-2 in the instructions above. Brown meat, add beans.Steps 3-6 in the instructions above. Simmer beans to soften, add taco seasoning, add salsa, stir, and simmer. Enjoy!
Notes
It was really tough to come up with a name for this recipe because in our family, we affectionately refer to this meal as “Taco Slop” because it is so versatile and can be slopped on anything from a tortilla, a chip, or a salad. When I first started writing my blog, I knew that I wanted to share this family favorite from the start, but I knew that if I titled it “Slop” I probably wouldn’t get that many views. I hope when you try this recipe that you can develop your own name for it. Call it whatever you like! But if you find things about it that you like to change or add, please write a comment below and share it. I’d love to hear about your version!
While carving pumpkins with my 3 year old son this year, he requested bat wings for his design. Luckily for him, momma is a quick thinker and is fairly resourceful. I really hope that’s something he inherits from me, haha! I took a look at what we had available around us and quickly threw together some bat wings made out of pipe cleaners, a plastic shopping bag, and hot glue. Sure, they’re not cosplay quality, but for decorating a pumpkin to last just a week, beggars can’t be choosers. Here’s a quick and easy run down of how I did it. I’d love to see or hear about your changes and additions, so please leave me some comments below!
Instructions
First, using pipe cleaners (this is what I used out of convenience), straws, popsicle sticks, wooden skewers, or any other light, strong material, form the “bones” of your wings. Check out images #4, 5, and 6 below for a visual example of how we shaped our pipe cleaner wing bones.
Flatten out a plastic grocery bag.
Cut handles off of plastic bag.
Cut down sides and seams of bag and separate into two pieces. This allows you to flatten out the whole grocery bag. Cutting it into two pieces is convenient if you are making two wings.
Glue your “bones” to the flattened plastic bags. Hot glue is probably the easiest and fastest method but I’m sure you could use others. But other, more liquid types of glue might not hold as strongly.
Using a permanent marker, draw cut lines for the material between the wing “bones.”
Cut along those lines or past them to achieve a cleaner look with no marker lines on your finished product. Cut the overhanging bag material off from around the “outside” of the wing bones so that the material only shows between the “fingers” of the wings.
The finished bat wings before we placed them on the pumpkin.
Final Notes
Sure, this is a cheap craft and isn’t really something that will last long, but it is a good example of how you can use materials from around the house to enhance something else. A lot of us have these pesky plastic bags floating around the house with very few ways to re-use them.
I strive to find ways to re-use materials in my house, even if it’s not a long-term solution. At least these materials can find a temporary re-purpose and brighten a day and make memories. My son was so excited when I could just dive into the recycling bin and pantry and make him some pumpkin enhancers. It was a fun way to show my kids how you can use your imagination and resourcefulness to lessen your burden on the environment even in the smallest ways.
I’m also hoping to use the things that I learned from trying this simple craft to apply to larger and more intricate crafts later on. There are a lot of possible applications in cosplay or future Halloween costumes here, and I learned what some of the hangups could be in those applications. Share with me what you’ve learned or how you used this craft below in the comments section. I look forward to hearing from you!
And here’s our finished pumpkin hanging out with his other friends!
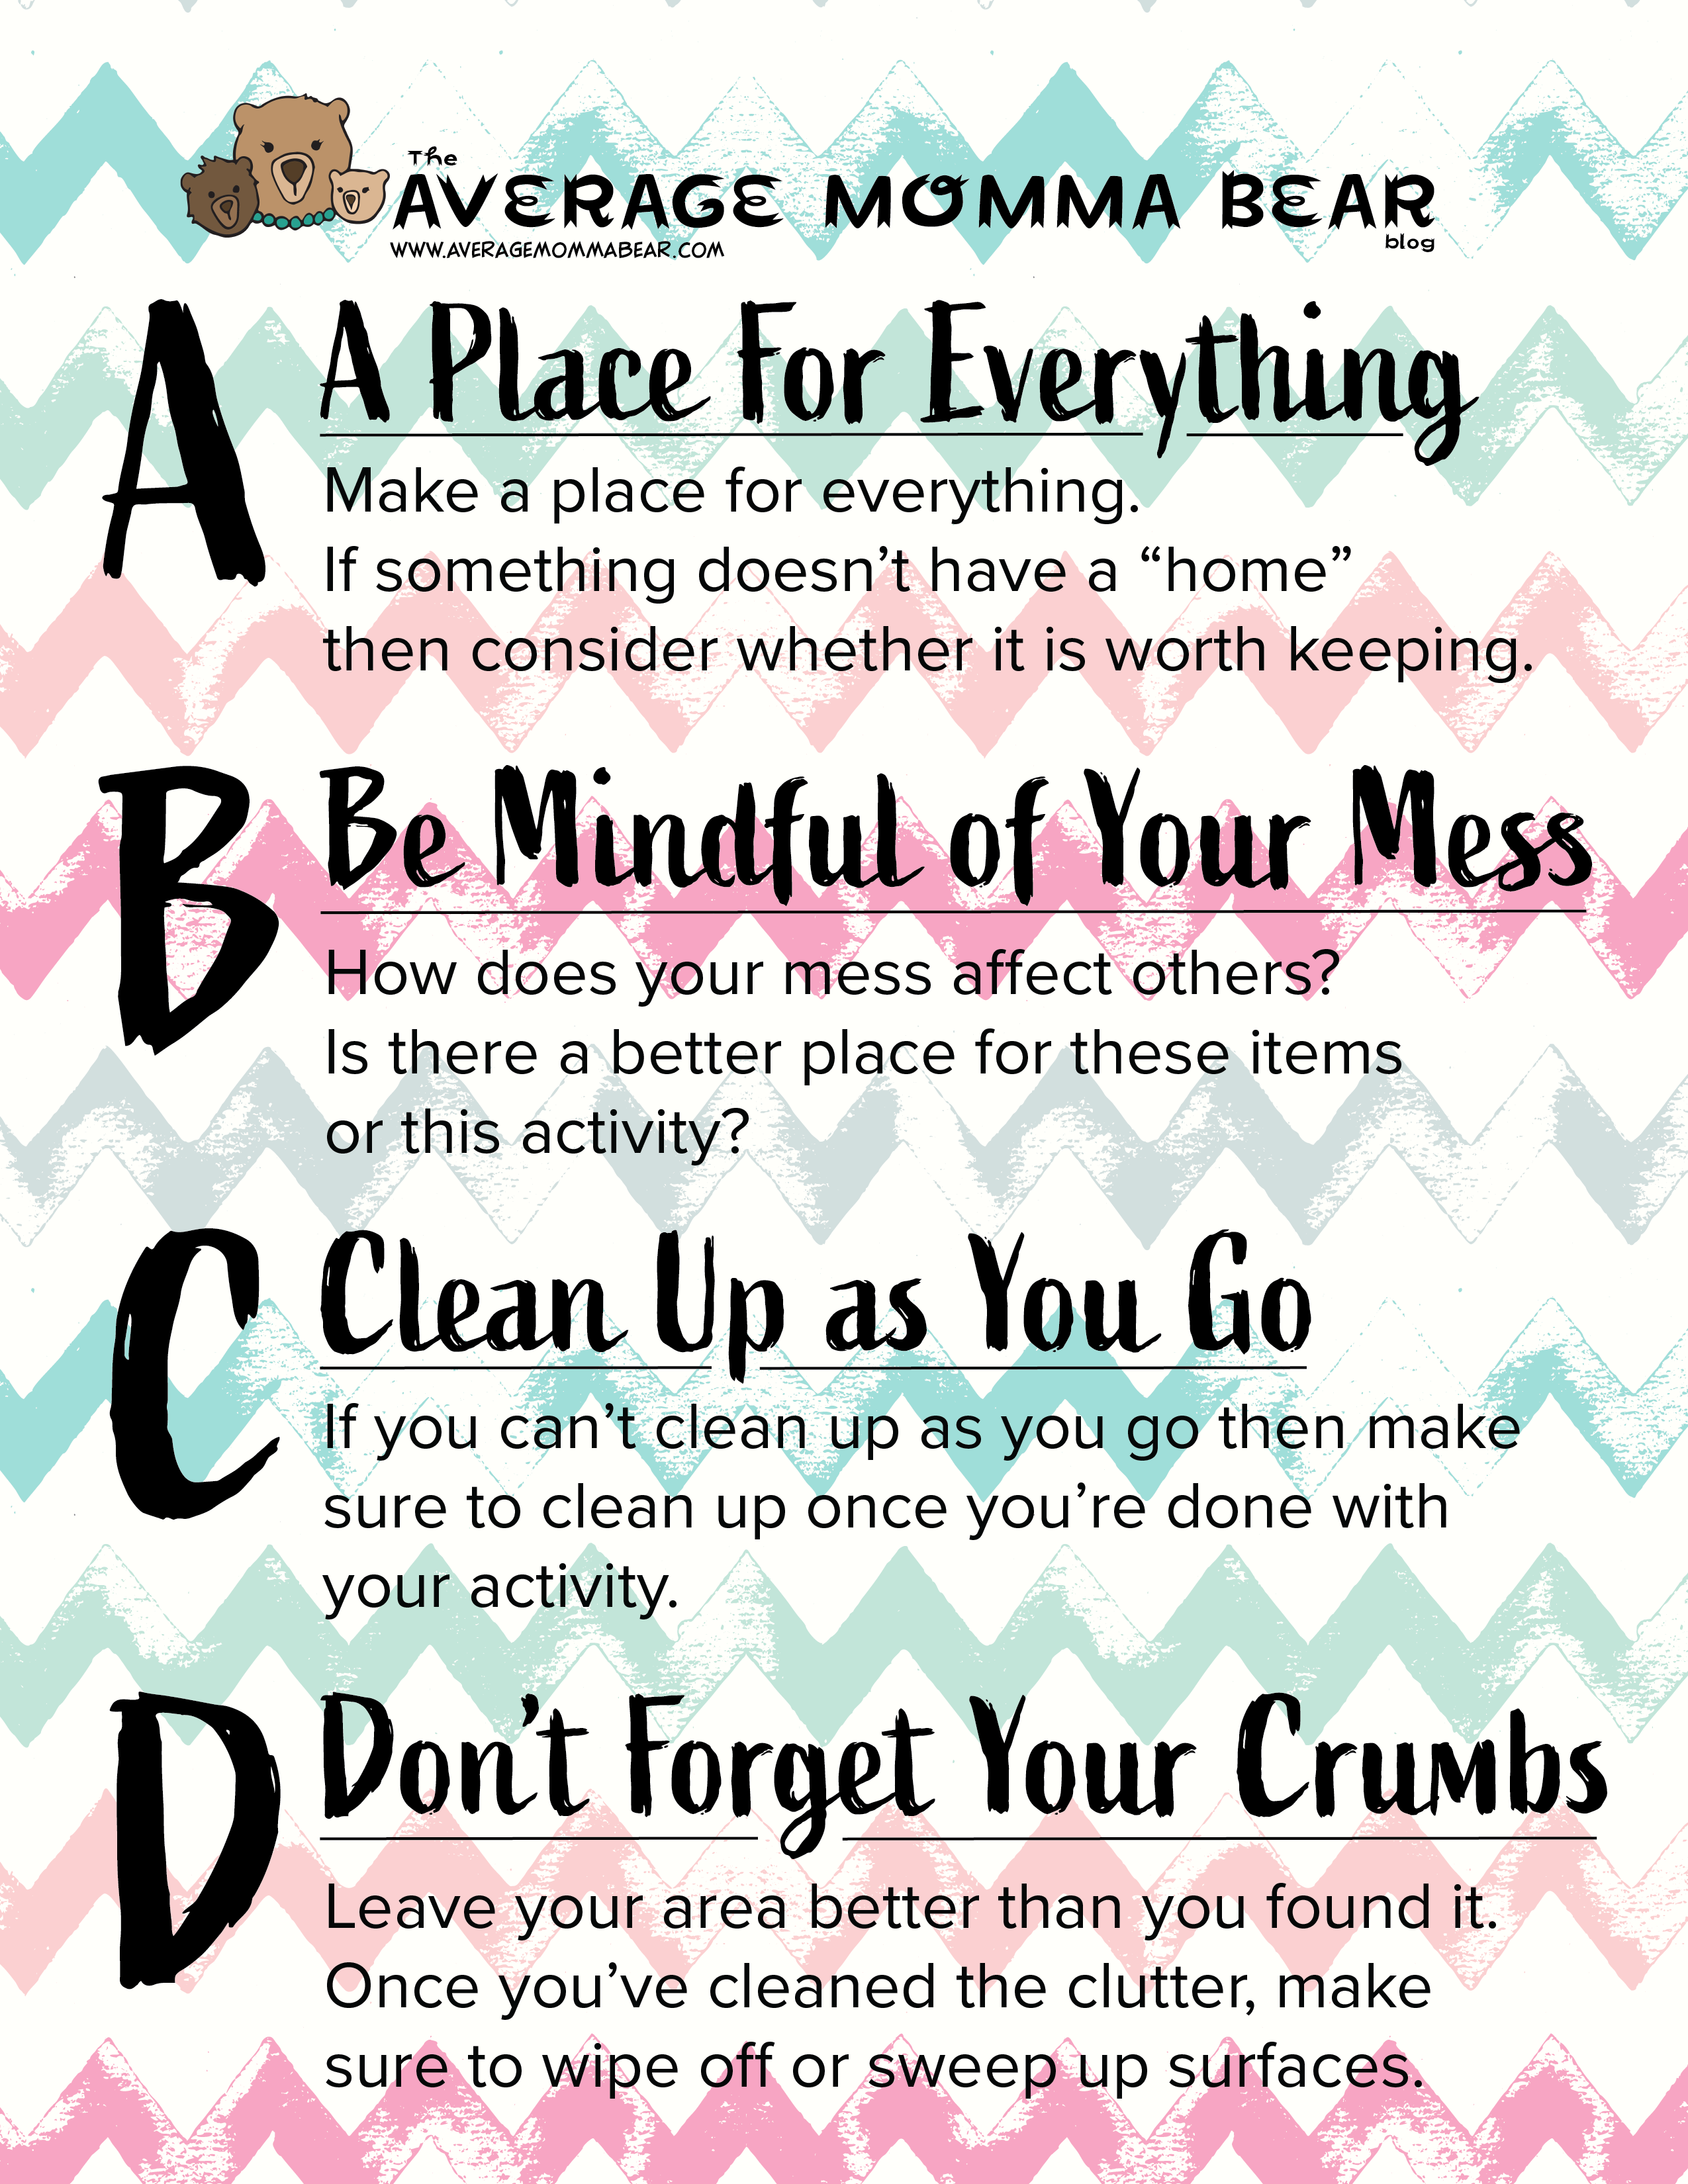
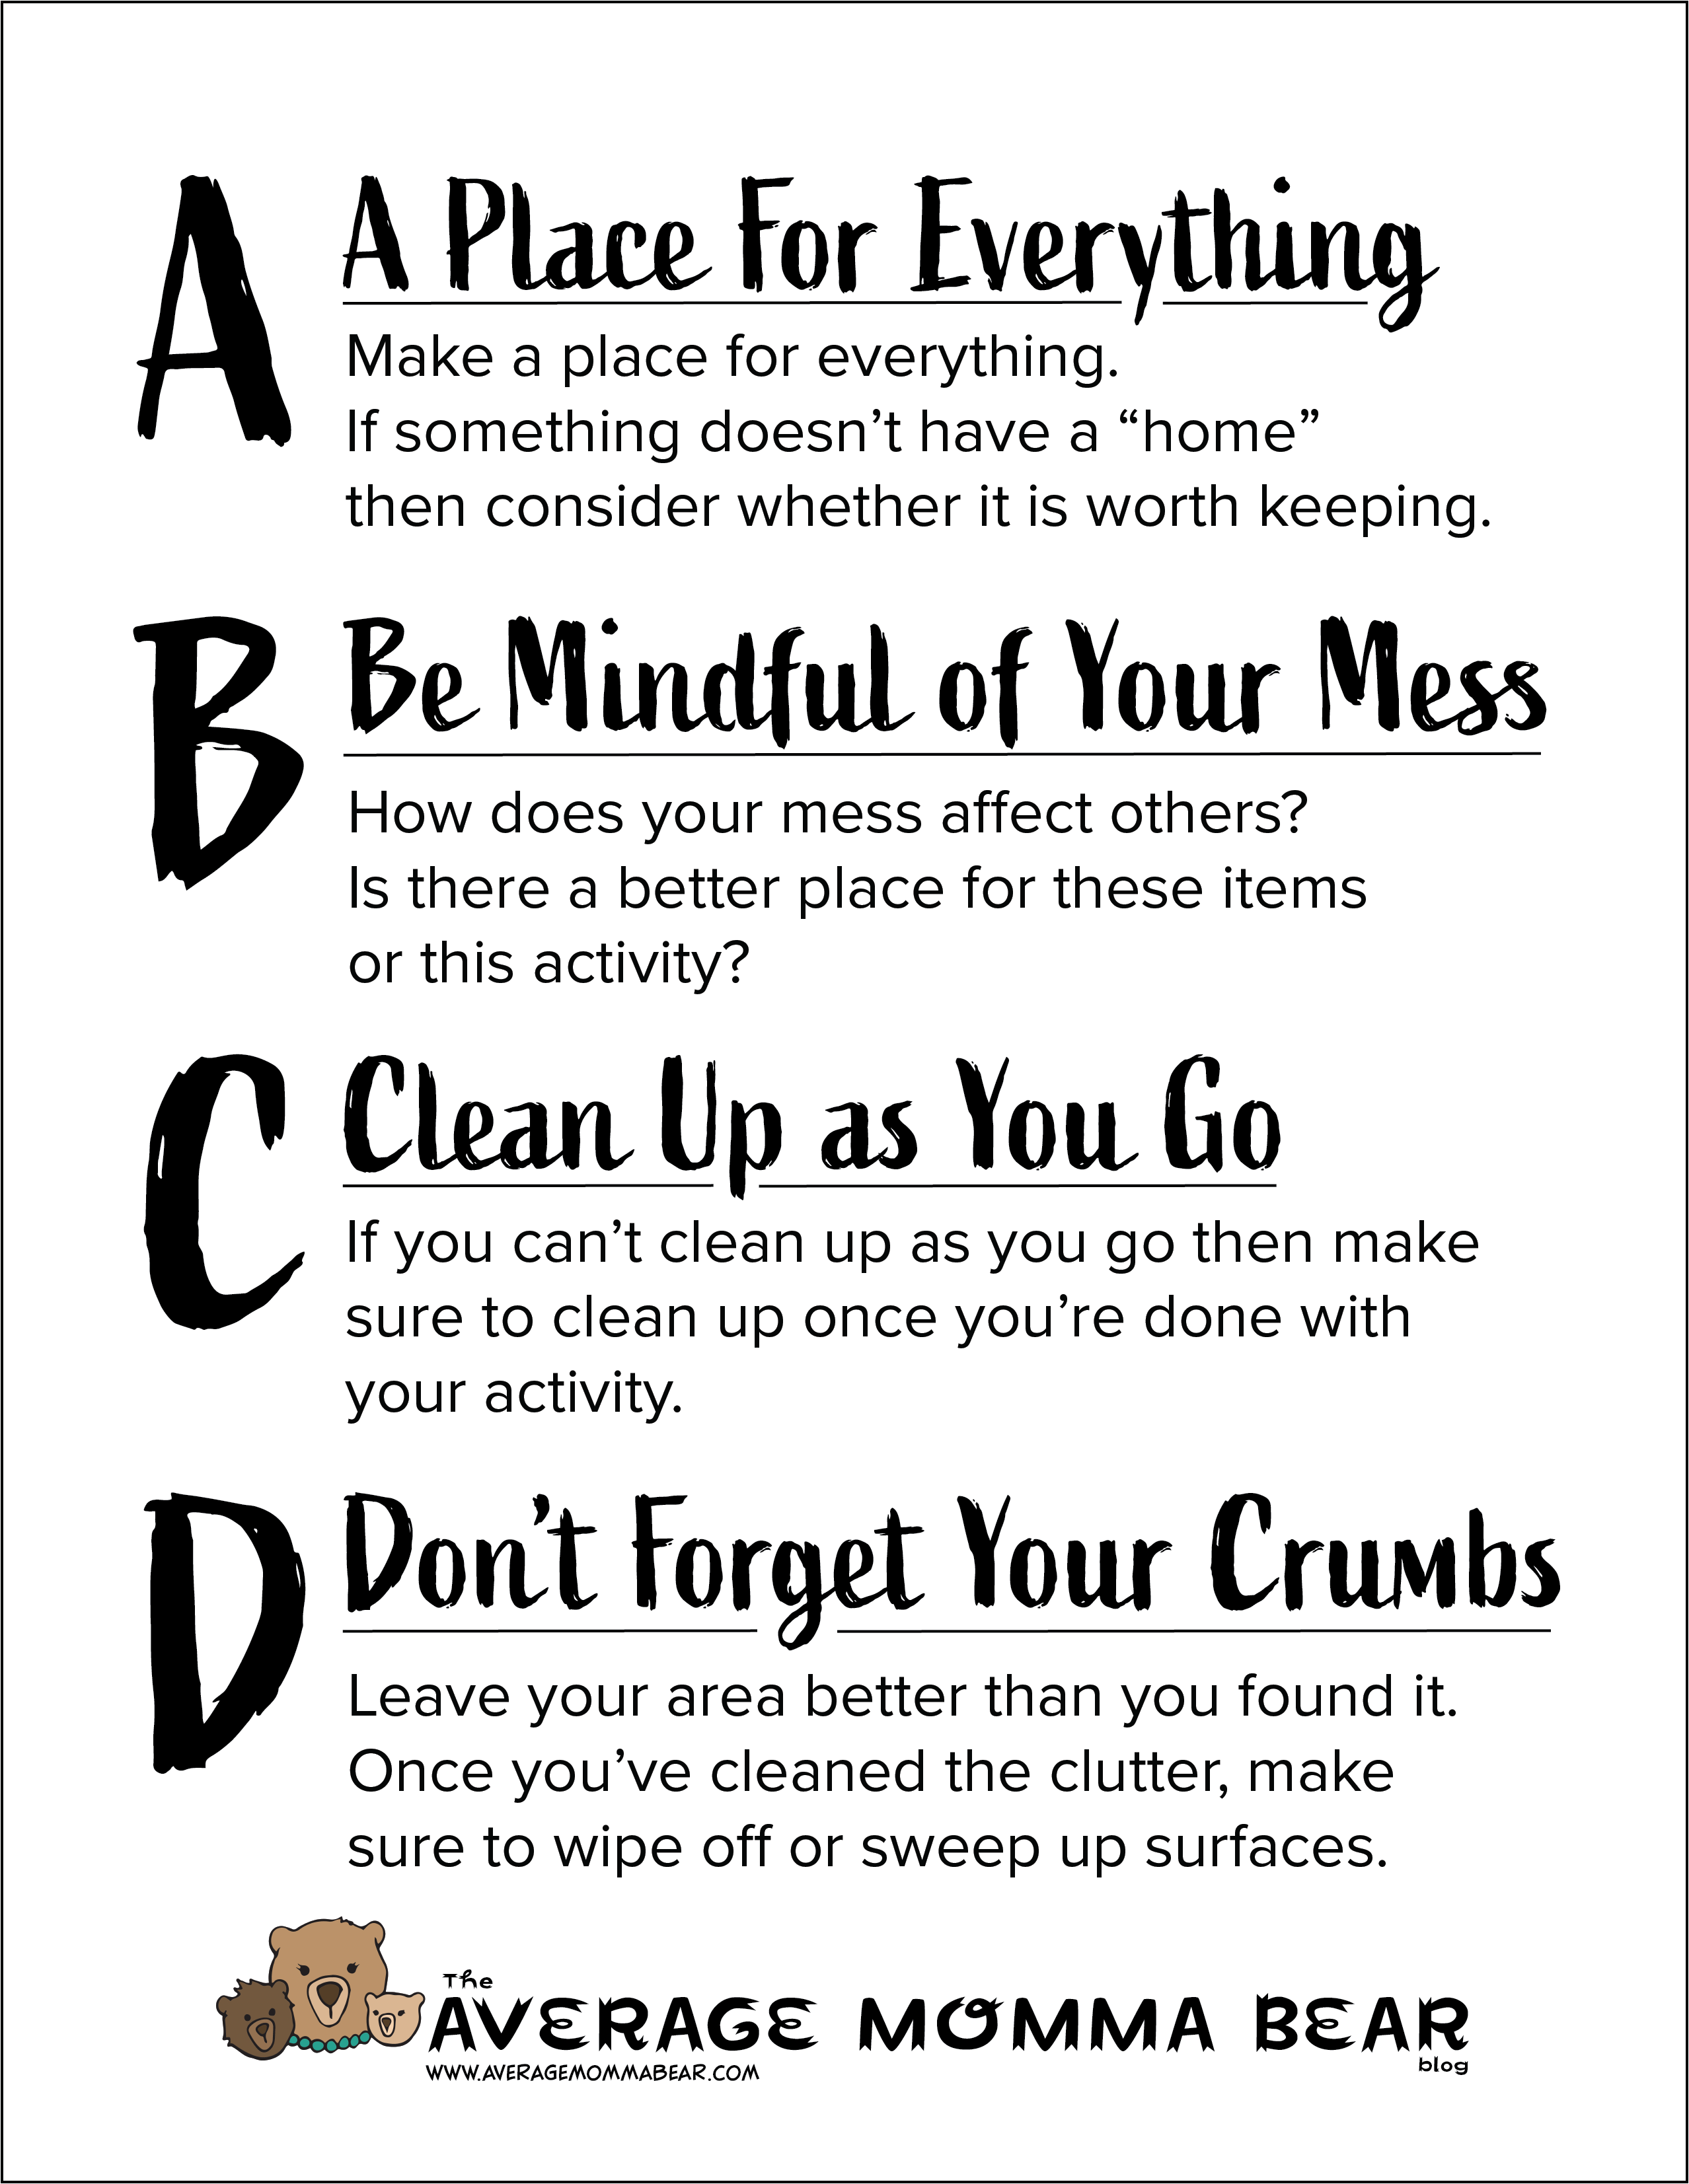
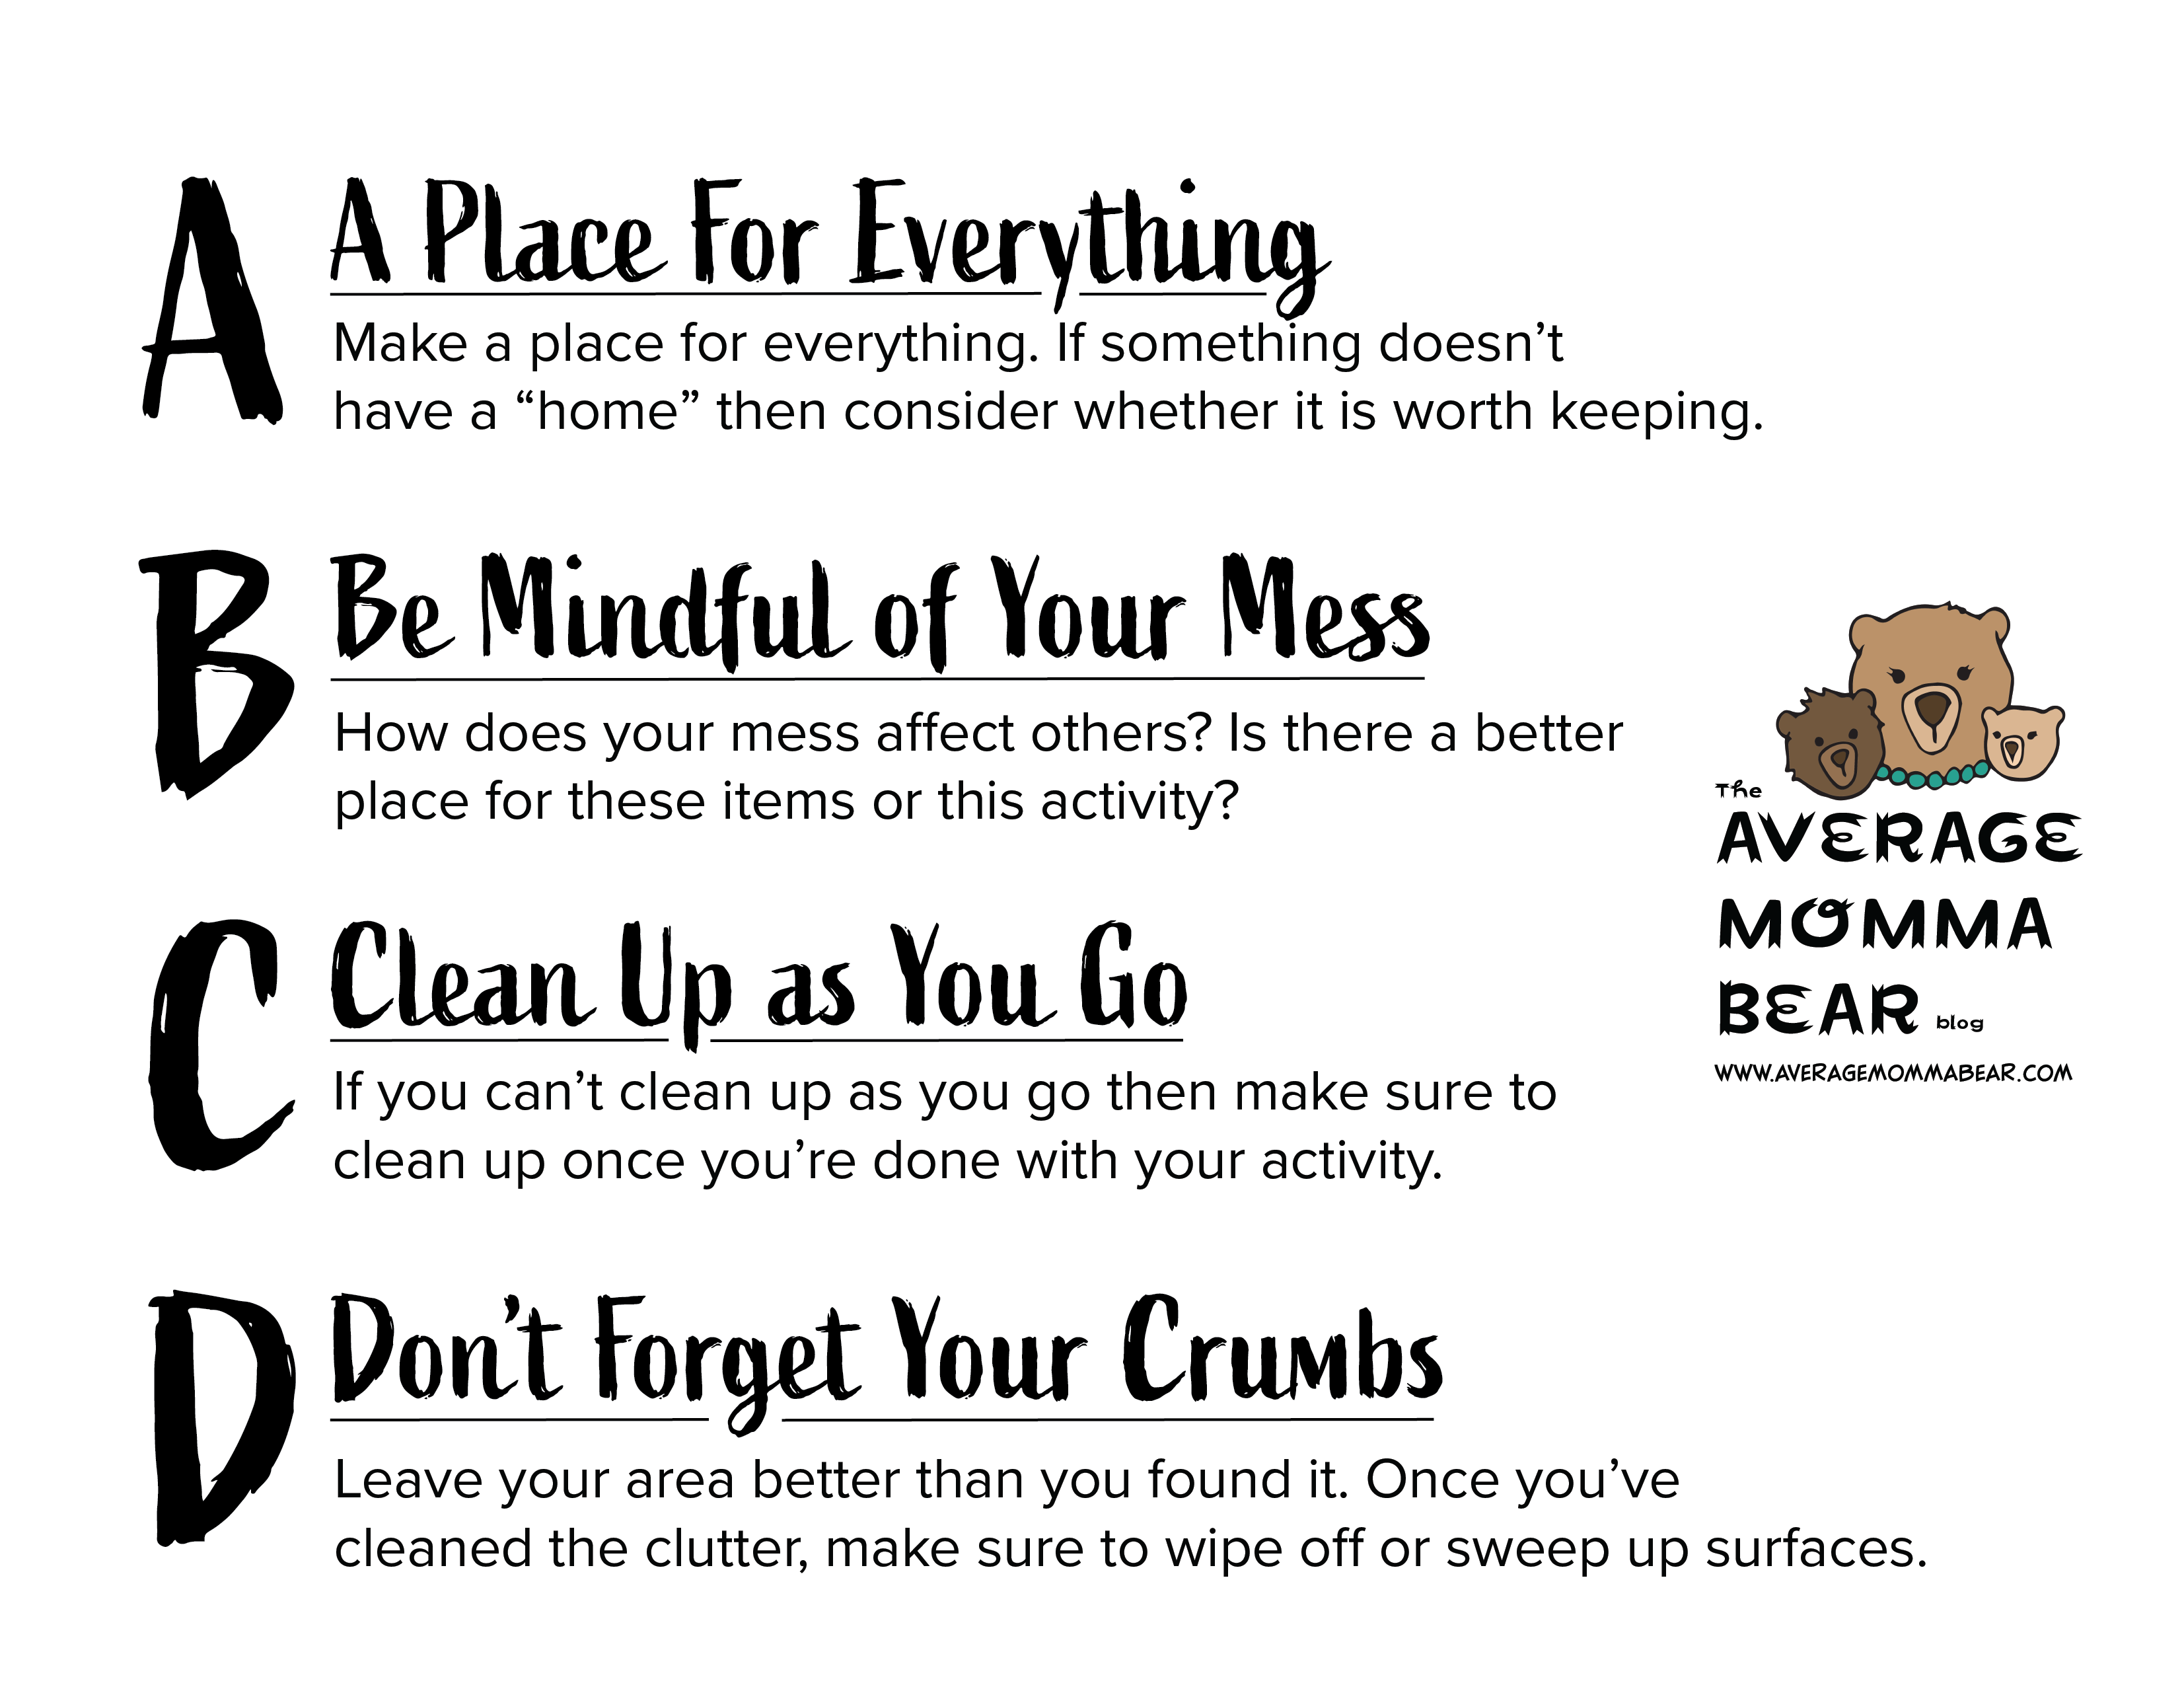
Clutter happens to all of us. But just because it’s a reality doesn’t mean that you can’t conquer it. I’m excited to share these cute little signs I made as a gift for you! They’re great for classrooms, play rooms, bedrooms, or anywhere! Print as many as you want and post them as a great reminder of where to start on your journey of overcoming the mess. If you practice my A, B, C & D rules you can start to build a good habit! Be sure to check out my POST about the first 5 steps I take when cleaning and organizing a cluttered area. I’ve also written about my secret to keeping my bathrooms clean HERE. Good luck!
Is a first time mom ever really prepared? Mom groups, Pinterest, blog articles like this. Read all you want, there are a million things you can’t prepare for as a parent. I’m not saying this to scare you, or maybe you’re already painfully aware, I just want to share my experience with you. When I had my first baby, I was as prepared as I could be. Had all the equipment I needed, read as much as I could to learn about what to expect, I even took classes to prepare me for childbirth. But even after all that, I still suffered from postpartum anxiety and depression for over a year after my baby was born because I was inexperienced as a parent and didn’t understand the signs. I was sleep deprived, suddenly eating anything and everything I could out of convenience, riding the hormone roller coaster, and spread thinner than I ever had been before. I couldn’t believe that being a mother was a miserable thing. I couldn’t believe that something I had wanted and looked forward to most of my life was a mistake.
Misery’s Company
I spent the first year of my first child’s life hating almost every second of motherhood. Never for a second hating my baby, but I couldn’t keep from wondering if I shouldn’t have tried so hard to become a mother. I looked at my rainbow baby, for whom I had fought through fertility issues, through tears and months of disappointments, and thought “why don’t I enjoy being a mother? What is WRONG with me?” I thought this over and over for months. Never finding an answer. I felt horrible for not desiring to leave my house or take my baby out into public. I didn’t want to join any mom groups because I feared that I was such a horrible mother for the way I felt that other moms would shame me for sure. Sharing this story now is hard enough because I’m sure there are still some moms out there who might be reading this thinking I was a horrible mom for feeling this way. Thankfully, postpartum depression and anxiety are gaining more awareness. More parents are sharing their journey. More parents are understanding the signs and signals. You can read my post about my postpartum mental health struggles HERE, complete with a long list of my personal symptoms.
“I looked at my rainbow baby … and thought ‘why don’t I enjoy being a mother? What is WRONG with me?'”
After a year of struggling as a mom with PPD and PPA (postpartum depression and anxiety), I finally realized that I needed to address my mental health. Being a mom is equal parts mental, physical, and emotional effort, but even after my moods improved, my brain fog lifted, and I started to feel less overwhelmed, I was still left with regrets and guilt. I regretted not being able to dote over my brand new baby, not wanting to do a newborn photoshoot, or even dress my baby up in his cutest onesie and show him off at church. I felt guilty that I didn’t enjoy being a mom, I didn’t wear cute coordinating outfits with my baby, I didn’t want to do playdates. And to complicate feelings even further, my hormones had started to tell me that I wanted another baby. What kind of cruel joke is it that our bodies can give us mixed signals like that?!
And Then Comes Baby…#2
To make a long post short, we became pregnant with our second baby when our first was only 16 months old. It was joyful and daunting at the same time. Exciting and overwhelming. I prepared for the worst and hoped for the best, but I assumed that my hormones would torture me again and drive me back down the postpartum struggle highway. Fast forward nine months through a fairly basic pregnancy (for which I thank God), a week overdue, we decided to have me induced because my gestational diabetes had our baby measuring large to begin with. After an even longer and more difficult labor than my first, I figured it was just the beginning of my second round of struggles as a mom. Call me a pessimist, but suffering through PPD and PPA and feeling guilty about wasting your first year as a mom will have you seeing things in a cautious light. Things didn’t seem any different at first, but it wasn’t until I finally held my baby after the nurses cleaned her up, measured her, checked her health, swaddled her and handed her back to me that I started to be able to hear my own thoughts and notice a change.
For the first time since becoming a mom over two years before, I had a moment of calm. As I looked down at my second baby, I realized that I DID know what to do if she cried. I DID know how to hold her to breastfeed (even if I was a little out of practice), I DID know how and when to change a diaper. I wasn’t instantly overwhelmed or scared, and I didn’t feel alone. I felt confident that my husband knew what to do and that I could actually try to sleep in the hospital before we took her home. Then, I chose to hold my new baby not because I was afraid to put her down but because I wanted to look at her tiny, perfect face and take in everything about it. I was able to focus on tiny details like her eyelashes, soft cheeks, and tiny fingers instead of feeling overwhelmed by the hugeness of the situation and the responsibility of caring for a new life. I didn’t wake up in a panic when she would start crying. Not only was I prepared to be a mother, I was finally enjoying it.
Starting Fresh
Remember the feeling of starting a new job and being awkward and scared to answer the phones or not have the answers a customer needed? Being a first time parent can feel kind of like that, but instead of disappointing a fellow adult human, you’re suddenly responsible for keeping a tiny human alive. No pressure, right? But once you’ve had that job for a while, you know where to find everything, you’ve learned the answers to almost all of the questions, and you have more confidence when answering the phone. This is closer to what being a second-time parent is like. Now, that’s not to say that parenting a newborn and a toddler at the same time is a piece of cake, but you might be able to approach the situation with a little more confidence than when you were a newbie.
Once we got our precious cargo home, it began to sink in for me that maybe I was on some sort of naive high from the pain medication from the hospital. I thought for sure that I would begin feeling overwhelmed at any moment. Thankfully, as the days progressed, my confidence stayed the same and even in the more frustrating moments, my brain didn’t fail me and gave me the proper mixture of patience and clear thinking that I needed. Late nights were rough but didn’t affect me the way they had before. I didn’t spend my hardest hours alone, struggling to feed my baby and crying in the dark. Instead, I would leave just enough light on so I could watch her sweet, little face looking up at me and shooting hearts out of her eyes at me while she fed. It immediately soothed my soul, calmed me, and restored my confidence as a mother. I hadn’t failed my children, I had just been fighting my body’s abnormal hormonal responses.
Redemption
My second baby restored my faith as a mother. She helped me understand that the feelings I had with my first were not my fault. Even if my brain was the one speaking the lies, I didn’t have to believe a word of them. My second baby showed me what it felt like to enjoy my opportunity to be a mom. She made me feel that even though I wasn’t (and still am not) perfect, it wasn’t about being perfect. Even though she wasn’t directly responsible for this change in feelings, I thank her for helping me realize that I didn’t fail my first baby. I didn’t realize how much I needed a second baby until I realized that that baby was my redemption as a mother. I didn’t actually hate the newborn stage. I didn’t actually hate getting up every two hours to feed my baby. I didn’t actually hate sacrificing my body and my comfort to feed my baby. I didn’t actually hate having to hold my baby until my arms ached. Those were just all cruel jokes played on me by my postpartum body after my first pregnancy, and I felt a new sense of purpose and pride in doing those things.
Rainbows and Butterflies
This is not to say that everything has been all rainbows and butterflies after this second pregnancy, but it is a stark contrast to my first. I share all of this with you to give you hope. If you are struggling, have struggled, or are afraid you will struggle again with your postpartum mental health, I want you to know that those struggles are NOT your identity. Those struggles don’t define who you are as a mother. And they aren’t written in stone. Your children love you despite those things and may never even know you struggled in the first place. Make your health a priority and seek help with a doctor, counselor, friend, pastor, or anyone who cares about you. You are worth that redemption.
Cleaning and organizing does not come easy to everyone. If you’re hoping to improve your methods and attack some cluttered areas, you’ve come to the right place. I have a passion for cleaning and organizing, but that didn’t always come naturally to me; I had to work at it over the years. Now that I’ve found some shortcuts and tips, I love sharing them to help others. Here are the 5 main ideas I use when first attempting to clean and organize something.
Number 1: Break it Down
This idea applies both to physically breaking things down to fit into the space better and to breaking the job down into manageable pieces. For example, if you want to organize a whole room, start with the closet. Even that might need to be broken down even further (i.e., organizing clothes before other items). This idea can take an overwhelming project and turn it into bite-sized pieces. Dedicate your time and energy into doing things carefully and slowly. Be aware of the fact that a project like a whole room might take several C&O (cleaning and organizing) sessions. Typically, I dedicate myself to one project per weekend since that’s the only time I can really focus on a task.
Our old high chair has a great break-down feature of folding up so it fits well in the space in our shallow closet under the clothes.
In regards to breaking things down physically, this is definitely the first thing I do when I approach a project. Is there anything being stored in this area that could be broken down to take up less room? My most recent project was a closet stuffed full of baby items that we’ve grown out of in our current stage. This included things like a bassinet, a jumper, a baby swing, a high chair, etc. Some of these items were made with built-in storage features like collapsable legs or removable covers, but many of them can be broken down further. If you have no plans to use these items in the near future, breaking them down to their easiest-to-store size can be a huge help to you in the meantime. I go in to better detail below in number 4 about breaking items all the way down and the best way to store them.
Number 2: Vertical Space
Vertical space often goes overlooked and underused. If something can be stacked upright as opposed to laying down it can create a lot of extra space. You can also store items in stackable boxes. Depending on how large your items are, you can typically find shoebox-sized plastic bins at the dollar store that work great for stacking to make use of your vertical space. And make sure to label, label, label! Check out the last section, number 5, for more information on that. If you’re storing things like books or folders, make sure to stand them upright. If you still have some vertical space above those books or folders, look into making or buying small shelves that can create another shelf for stacking above them. Refrain from stacking books or folders on top of one another. This makes it extremely difficult to access books on the bottom should the need arise. And if you awkwardly pull something from the bottom, and it knocks down the whole stack, now you have a new mess on your hands. It’s better to think ahead for the sake of accessibility.
In photo #1, I am illustrating a good use of vertical space. The closet space extended vertically beyond the doors so I made use of that vertical space by stacking things upright. In photo #2, I show how things like folders and papers can be placed in a more upright position to save space as well.
Number 3: Out With the Old
Holding onto something “just in case”? Chances are, if that case ever happens, your feelings and circumstances might be different enough that you may not even need the thing you’re holding onto. For example, sometimes I hold onto some shirts or outfits with a plan that I’ll wear them again someday after I magically lose weight and gain confidence. In reality land, if the stars aligned and I was able to wear those outfits again, I’d most likely be more excited to buy new clothes because my tastes change over time as well as my budget and the available styles. As a personal rule, if I haven’t worn something in 6 months, I consider donating it. If I haven’t worn it in a year, I do. This rule can apply to anything you’re storing. If you don’t have a specific plan for the item, consider donating it after storing it for 6 months to a year. This will help keep your storage levels at a more manageable level and make room for newer items that may need storing.
Number 4: Keep it Together
This idea goes along with breaking items down. If you take something apart or break it down into smaller parts, think ahead to a time when you may need to reassemble it. Before I take things apart, I always make sure I have three things handy (other than tools): a small Ziploc baggie, a permanent marker, and tape (packing tape works best, but most tapes will work). As I remove small parts, screws, nuts and bolts, I place them all in the baggie. Then I label that baggie with the name of the thing I took apart and tape the bag to one of the larger pieces to make sure they stay together. Just throwing the small parts baggie in with the larger pieces creates a risk of losing them. Make the effort to keep the parts together. This method also works great if you’re disassembling furniture when moving. Labeling the baggie and taping it to the piece of furniture has saved me from losing the small parts several times.
Garbage bags work great to keep all pieces together but aren’t the best long-term solution. If something needs to be stored long-term, look into getting it its own storage container.
Number 5: Label Now, Find Later
Labeling things is a labor of love. It takes a lot of extra work and planning to keep things organized in the long run. I find it best to label things as I go and to commit to finishing the job completely, which means labeling things as best as possible before moving on to another section. Too many times have I started to label things only to get distracted by another section that needs my attention, and when I come back to where I was originally working, I’ve forgotten what I’ve packed in which bin. I find the easiest way to label is to use a white duct tape or colored masking tape and a permanent marker. This is the fastest, cheapest way to label. If you’re looking for a more polished look to your organization, you can always take things a step further and invest in a label maker or, better yet, use a vinyl cutting machine to stylize your own personalized labels. But unless you’re hoping to get a lot of likes on Instagram and saves on Pinterest, I suggest going with the quick and easy tape and marker method. It’ll keep you from hating the whole process and giving up before you finish.
In Conclusion
These methods only scratch the surface of deep cleaning and organizing, but they’re a great place to start. They’ll help you tackle any clutter, great and small. Just keep in mind that breaking your C&O jobs down into smaller chunks is the way to go. If the stuff you’re cleaning and organizing hasn’t gone anywhere in years, there’s no real rush if it means things don’t get done right.
Full disclosure: I DO NOT make any money or get any promotional kickbacks from Lumē for my review. I am reviewing this product only as a consumer/customer.
Well, here I am again. Back almost 8 months later to give you an update. I first tried Lumē deodorant back in January of this year (2019) and was pleasantly surprised by the results. But I knew, looking forward, that I wanted to conduct a little experiment to truly test the results. As I mentioned in my original Lumē review HERE, I’ve experienced sweating and odor since I hit puberty in middle school many, many moons ago. I’m not shy about it anymore, but you can be sure that I’ve put this product to the test.
Detox
I’ve read that when switching over to a more natural deodorant (without aluminum and some synthetic chemicals) your body tends to go through a bit of a detox period. Before trying Lumē, I had been using Dove deodorant for many years, believing that it was the gentlest non-natural deodorant I could find. That might have been true (it’s an unfounded theory), but I did experience clogged pores, ingrown hairs, and darkened skin under my arms consistently while using Dove deodorant. This leads me to believe that it wasn’t as gentle as I would have liked.
The first time I tried Lumē, I found that my detox period was surprisingly short, but I think that was due to the fact that it was still winter, so my sweat levels really didn’t test the limits of Lumē’s capabilities. During my first trial run with Lumē, I did notice an improvement in the health of my underarm skin. After my detox period, my underarm skin was smoother, lighter in color, and less prone to ingrown hairs after shaving.
Putting it to the Test
The weather this summer has been abnormally mild for us, but my armpits are still under a lot of stress, hormone level changes, and more temperature changes than they were the first time I used Lumē. We’ve shoveled literal tons of rocks in 90°+ weather this summer, plus I was finally able to finish my breastfeeding journey with my youngest, so my hormones have been up and down like a rollercoaster. It is possible that I’m still in the midst of my second detox period while using Lumē, but it’s been over a month since I started the new stick, so I’m hoping that’s not the case. To say I’ve been putting the product to the test is an understatement. I have noticed that I have been abnormally smelly…hooray. But I do feel like that has started to taper off.
This second time around, I don’t feel like I’m getting the same distance out of the Lumē formula that I was the first time. I’m definitely not getting more than 24 hours coverage out of the deodorant, plus I’m having to reapply occasionally, so I may be using up the stick faster. I’m hoping to be able to do a third review of the Lumē products later on this year, and I can update that review to reflect how fast I’m using the products based on the time of year or weather temperature.
What’s That Smell?
One thing I noted in my original Lumē review was that I didn’t like the smell of the original scent. In fact, I think that was the only thing I didn’t like aside from the cost. The original scent is called Lavender Sage. Usually I really like both of those scents, but for some reason I didn’t like the way Lumē had combined them. It smelled too much like chemicals to me (even though that’s not what I was smelling).
This second time around I was planning to order the unscented stick deodorant, but when I went to order, I noticed that they had added several new scents. Aside from the Lavender Sage and Unscented, they added Juniper Berry, Jasmine Rose, and Silver Spruce. (These sound like names of kids you see trending on Instagram…) I chose to get two–one Juniper Berry and one Jasmine Rose–just in case I didn’t like one of them. Once I got the sticks, I noticed that neither smell really stood out to me as especially appealing, but I liked the Juniper Berry more, so that is what I’ve been wearing. I can imagine a lot of people will like the Jasmine Rose, but I’ve never really liked the smell of rose other than straight from the flower. I have a feeling that the scent might grow on me when I start using it. I’m also interested to try the Silver Spruce eventually. Initially, I didn’t order that scent because I was afraid it would be too masculine of a scent for me, but I think I’m now willing to give it a try.
Overall
After giving Lumē deodorant another try, I can say I do still enjoy the product. I’m using more than I had back when I initially tried it due to harsher conditions, but I think I get enough coverage that I don’t clear a room with my stench. I still don’t feel as fresh as I’d like, though. I’m not crazy about the scents that they offer either. Maybe it’s more that the base scent is something I’m not fond of, and the additional smells added to it are not agreeing with me. In reality, though, I don’t smell the scent often after I apply it, which is probably for the best. Ideally, you shouldn’t smell like anything unless you want to be distracting.
I think the most valuable thing I’ve gained from using the Lumē product is cleared and improved skin in my underarm region. Since puberty, my armpits have been a point of reservation for me. I’ve always struggled with excessive sweating, sweat marks, odor, and generally unappealing underarm skin. For years, I’ve tended to cover up and hide the problem, ashamed to show my armpits or wear anything other than black. After using Lumē, I’ve noticed an almost instant improvement of my skin. My underarm skin has been smooth, less bumpy and dark, and less prone to ingrown hairs. That said, I feel that the novelty of the product has worn off, and I’m a little disappointed that I’m constantly worrying if people around me can smell me. I do hope that it’s possible that I’m not fully through my detox period and that my freshness will improve with time and usage.
Based on the differences from my original experience, I think I might have to downgrade my rating to give this product: 3 out of 5 Bear Tracks. Hopefully my impression of this product will improve by my next update!


